¶ Intro
Making City Plans is extremely easy thanks to the Workshop Framework export system, and our City Plan Maker web tool which can be found at: https://www.simsettlements.com/tools/cpV2maker.php
This guide will go over the different fields and options of the web tool. If you would like step-by-step instructions on creating City Plans, I recommend the Learn to Create City Plans guided series of tutorials.
¶ Web Tool Explanation
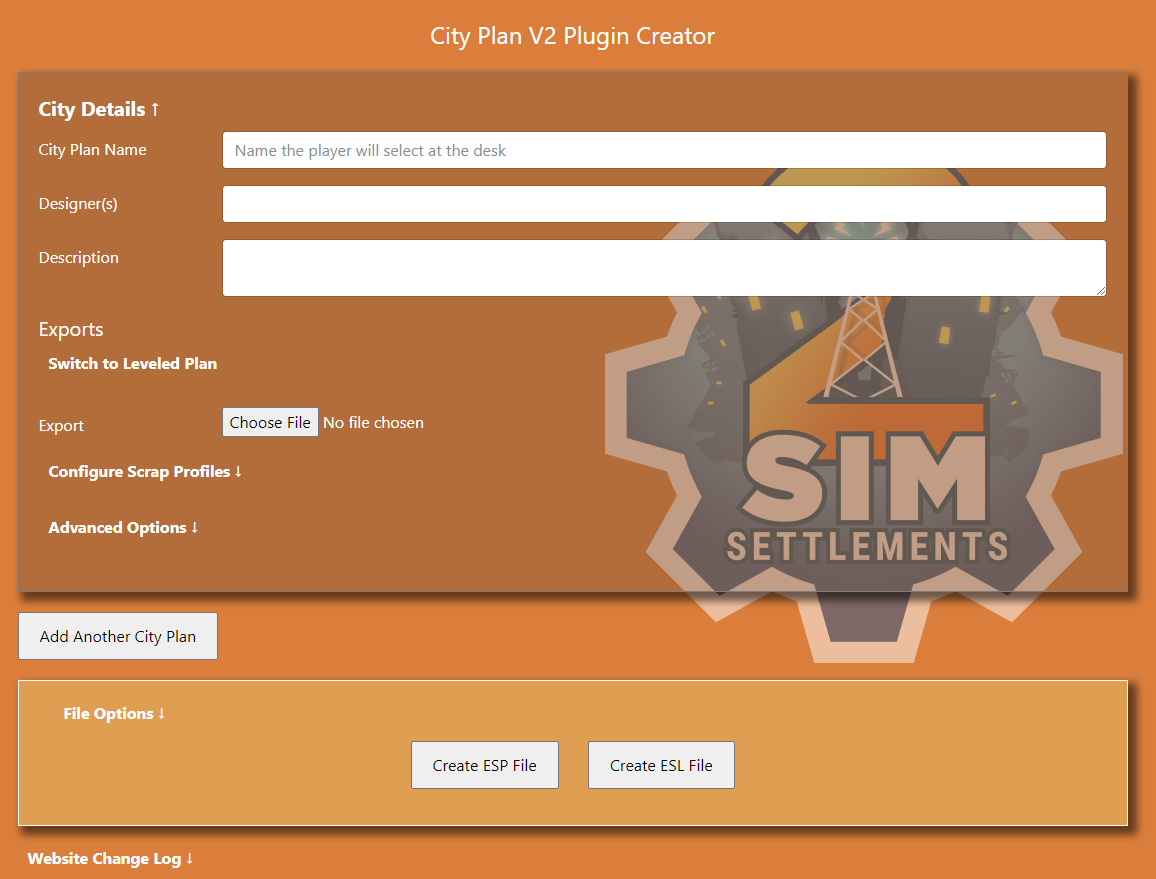
When you first load the Web Tool, you will be presented with something similar to the below image. We'll start with these fields and then move on to describing the expanded options that can appear.

- City Plan Name: This is displayed to the player when selecting a City Plan, as well as when viewing the City Plan details from the City Planner's Desk.
- Designer(s): This is displayed to the player when selecting a City Plan, as well as when viewing the City Plan details from the City Planner's Desk. This ensures players know who designed their settlement, which is especially useful if players have a large number of City Plans installed and allow SS2 to choose one at random.
- Description: This can display additional information tot he player when choosing a City Plan, and is a great place to give a brief description of what players can expect, and also deliver any other information you think is important for them to use your plan.
- Export: For Single Level City Plans, this accepts a Workshop Framework export file.
¶ Switch to Leveled Plan
Once you click this, the Export field will be replaced with 4 file upload fields as pictured below. The Switch to Leveled Plan link will then change to Switch to Simple Plan which will simply revert that section to the original single entry.
For this you can fill out any number of these fields, but should always start from the top and work your way down so that if you are leaving any empty they are the lower entries. For example, if you have just a 2 level City Plan, your higher level should go in the Level 3 Export box, and your lower level should go in the Level 2 Export box.
Most players will be expecting the 4-level approach though, so be sure to mention in your description if you are using less levels.

¶ Configure Scrap Profiles
Once you click this, a new section is revealed for setting up Scrap Profiles as pictured below. You can learn about creating these in the Non-Standard Settlements and Scrap Mods section of the Advanced City Plan Possibilties guide.

¶ Advanced Options
Once you click this, a new section is revealed with additional options you can configure for your City Plan. At the time of this writing, only one option exists, but more will likely be added in the future.
- Player Select Only: This ensures the City Plan is never randomly selected and that the player must explicitly choose it to make use of it. This is especially useful for niche city plans, such as extremely small or faction heavy themed designs that players probably wouldn't want in their pool for Settlers to choose from.
You can also learn about other advanced options you can set in the Creation Kit Edits section of the Advanced City Plan Possibilties guide.
¶ Add Another City Plan
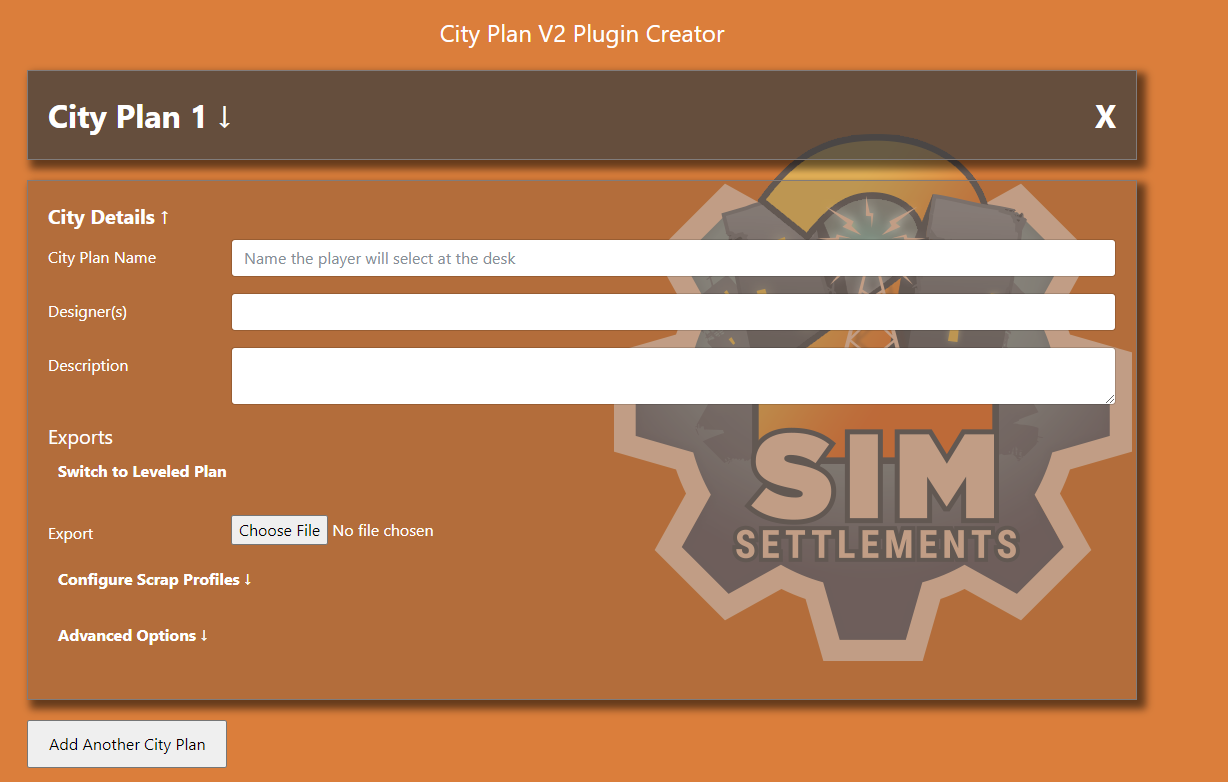
This button will collapse the other City Plan forms and show a new copy of the form. All of the fields will match the above described sections. This allows you to create a plugin with multiple City Plans.
If you do this, it is recommended that you record what order you are setting up your plans. If you ever want to go back and edit your City Plan's after you release them in a pack using this, it's often best to just regenerate from this web tool, rather than trying to edit the plugin by hand to correct positioning or remove items.
If you don't rebuild your City Plans in this web tool in the exact same order, the plugin will end up with different record IDs than what players have in their save files, and save corruption might occur.
The below screenshot shows what happens when the City Plan Name field is left blank, if it is filled out, the City Plan 1 text in the top box will be replaced with what's in that field. Making it easy for you to see which City Plan is which if creating a large pack in the web tool.
Clicking these collapsed City Plan entries will hide all others and reveal that one for further editing.

¶ File Options
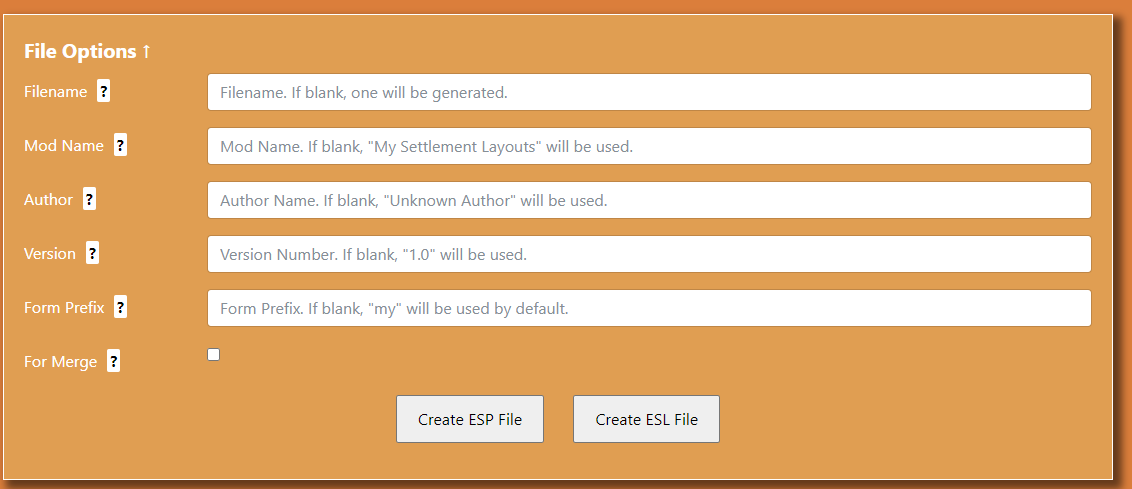
Clicking this link will reveal new options that apply to the entire file.
- Filename: By default, the plugin you download will be named MyCityPlans, unless you enter something else here.
- Mod Name: This will fill out a field used by the SS2 code to identify addon packs. It is not viewable anywhere by players currently, but may be in the future. This would be the name you referred to your mod as, not the file name. For example, we call the mod Sim Settlements 2, but the file name is SS2.esm.
- Author: The person creating the mod file, this will be used to fill out the Author section of the File Header.
- Version: Only enter a number here! This will fill out the Description section of the File Header with "Version " plus whatever you enter. This is used by programs like LOOT to help with load order.
- Form Prefix: When the web tool generates a plugin, it will prefix each new record with whatever you enter here. This can make it easier to find your records if you decide to work on your plugin file in the Creation Kit.
- For Merge: This eliminates the creation of the Addon pack registration forms, which are responsible for connecting your City Plan(s) to Sim Settlements 2. You should only check this in if you are planning on merging this plugin with an existing addon plugin.

¶ Create Buttons
Either of the Create ESP File or Create ESL File buttons will work and generate a plugin for all of the entered data. You could even click both and generate both plugins if you like.
For most people ESL will be the preferred type, as players can have thousands of ESLs, but can only have 254 non-esl plugins loaded at once.
City Plans make perfect ESLs, since they have very few forms involved and will never reach the form limit, even if you made a gigantic City Plan Pack.
If you are planning on doing any Creation Kit work on your plugin, ESP tends to be the easier to work with as you don't have to do any FO4Edit hacking to allow the Creation Kit to save changes to the plugin. Worst case, you can always convert it to an ESL or an ESL-flagged ESP later after you've done your Creation Kit work.